I have found that it is the little things that make a big difference. Making your bed in the morning is one of those little things. I know, you want to sleep as late as you possibly can so you have your morning routine timed to the millisecond. Shower, groom, dress, grab coffee and head out the door. But you'd be surprised at how much just making your bed can change things for you later in the day.
Just pulling the covers up and smoothing them out makes the rest of the room seem tidier and more inviting. You can have clutter elsewhere, but when the bed looks neat, everything looks neat. An army of dust bunnies can be amassing under the bed, but when the top of the bed is tidy, it somehow holds back the masses. Of course, you'll want to start with a bed that is simple to make. Give up on the hospital corners and don't knock yourself out if you can't bounce a quarter on the thing. Just grab the covers all together and pull them up, fluff the pillows and lay them where the top of the covers are. No one will know that you did a somewhat haphazard job. It will look much better already. If you have an array of decorative pillows that were pushed to the floor the night before, pick them up and spread them around. Now the floor is clear and the pillows are hiding any other lumps that may have been missed. Doesn't it look better already? It takes just seconds but makes a big improvement. I usually make my bed while I'm swishing mouthwash around in my mouth or waiting for the curling iron to heat up. That's about how long it takes.
At the other end of the day, when you walk into the bedroom, everything seems more inviting. You won't have to sort out the covers. One person hogged the covers, they're laying half on and half off the bed, pillows have been flung aside. You want to GO to bed but you have to MAKE the bed before climbing in. Making the bed in the morning eliminates this routine. And because the covers have been smoothed out all day, the material feels so much better on your skin. You can peel the covers back, lay your head on the pillow and fall asleep. Sleep well!
Tuesday, January 1, 2013

Friday, April 13, 2012
Jewelry Making
My creative juices started flowing when I decided to learn how to sew. Now I've added another outlet for creativity. I'm teaching myself how to make my own jewelry. It came about because I love jewelry but couldn't always find exactly what I wanted. I decided that I would just make my own. It's been going pretty well. I went to a bead shop, U Bead It, with my friend Evelyn. I bought a set of tools - wire cutters and crimpers. I bought a how-to book. And I bought an assortment of beads. Here is my first necklace:




It's pretty long so I usually wear it doubled. I made a couple more necklaces before moving on to earrings.


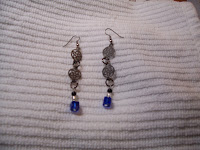
I enjoy making earrings more than anything. It's fun and I can get a lot of satisfaction out of it. I'm really liking all of the earrings I've made.


This is a pair of earrings with a matching necklace. The necklace took me a long time to make. I kept taking it apart because it wasn't working out the way I wanted it. I'm pretty happy with the way it turned out in the end.

This is a pair of earrings with a matching bracelet. I love this bracelet. It's made with memory wire. It just wraps around your wrist. It was so easy to make.

I'm really enjoying this new hobby. I love going to the bead shop and looking at beads, waiting for inspiration. Making the jewelry is a satisfying form of therapy for me. And I get new earrings, bracelets and necklaces anytime I want them. My next project may have to be a way to store all these new things.
Wednesday, January 25, 2012
Sew Some Towels
Tom gave me a challenge a couple of weeks ago: get some new kitchen towels and embellish them to match our table linens. I do believe in stealing ideas, so I went on-line to see what other people have done. I found someone who bought plain white kitchen towels and sewed their own material to "personalize" them. They sewed a five inch strip from one side to the other and then sewed a two-inch contrasting piece both above and below the larger strip. It looked easy, was within my capabilities and was totally cute. I decided to do the same. I went to Target and bought some white kitchen towels. When I got them home I looked at them more closely and noticed that the edges of the towels had a rather thick hem and I didn't think that it would work to sew pieces of material onto those hem. It would be way too thick. So I did what I normally do: I changed my plan. Since I didn't want to sew anything onto the thick hem, I would sew material up to the hem. It would look too funny to then have the white hem out on the edge so diamonds would be a good idea. This meant that I was going to have to actually do a little math. The towels were 14.5" from one hem to the other. I wanted four diamonds sewed on. I had to figure out how wide each diamond would have to be to fit without any overlapping. After some calculating, I needed each diamond to be 3 7/8" across after the seam allowance. I cut out the diamonds and pinned them onto all four towels before sewing any of them. It took me quite awhile to do the pinning in order to get everything lined up right. I discovered that during the sewing process, there was a little bit of shifting, but for the most part the diamonds ended up pretty up where they were supposed to.


And I STILL have more of that material left!!
Thursday, January 19, 2012
Sew, So Cute
 |
| From the "Sew, So Cute" book |
 |
| My own creation |
I came across a Mary Engelbrite sewing book at the library called "Sew, So Cute." There was a pattern in it for pot holders. Since I still have material left from the placemats and table runner, I decided to make some new pot holders to match. It went pretty well. I only sewed the "wrong sides" together and had to rip it out once. I knew how to sew on the binding from doing the placemats, but couldn't remember every little detail. I was determined not to have to ask my sister-in-law for any help, so I just started with what I thought would work, did it wrong and had to do it over on the first pot holder. As I was re-doing it, I had a couple of "Oh yeah!" moments and everything started to come back to me, which made the second one go so much better. While I was at it, I made two other pot holders out of the same material but with a different pattern. These went much quicker since there is no binding. I really like making things for my kitchen!!
Wednesday, January 4, 2012
Sew and Iron-On
The dining room remodel changed so many things and one of them was that the curtains in there didn't go anymore. New curtains were in order. I knew that I wanted to make them myself. I love the idea that I have curtains in my house that NO ONE else anywhere has. I started looking on-line for curtains that I could sew. I found these tie-top curtains that I really liked. I decided on an eyelet material because the window faces south, lets in lots of light and I really only wanted something that would frame the window. I knew that the curtains would never be closed - we have window blinds there for privacy. Tia and I found an off-white eyelet remnant at the fabric store on sale. So, score one for me! I had some of material left over from the table linens that I made and that would be what I used for the ties, but it wasn't quite enough. Luckily, the fabric store still had that fabric. Tia says that I am VERY lucky. Most times when you want a little bit more of a material, when you go back to the store they don't have it anymore. Score another one for me!! I started by stitching around the sides and bottom. Because the curtains are always going to be tied back, I did a curve around the inner corner so the curtain would fall right. (Tia's suggestion. I never would have thought of that.) I then stitched across the top. I used a scrap of material to test the right length and width of the ties so that they would look right and tie right. I made twenty ties. Two would be "paired up" and I thought five per curtain would be adequate. I pinned them on to see how it looked and discovered that I really needed seven sets to hold each curtain just right. But the material was floppy. I consulted with Tia and she told me to use interfacing to stiffen the material. I should try to get one-inch wide interfacing that I could iron on. Interfacing? I'd never heard of that. I figured that I'd go to the fabric store and there would be a lovely display of interfacing, easily marked and simple to select. When I got there, I saw no lovely display. I saw no interfacing display at all. I asked the clerk and was told that she was new, didn't really sew and wasn't at all sure what I was talking about. At least she was honest. But she did take me to some bolts of something that were not called interfacing but were probably what I wanted. There were some that were thick and some that were thin. Some had to be sewn on and some had to be ironed on. What to do? The clerk was no more help than that so I was on my own. I decided that since my material was pretty thin, I should go with the thinner choice. And I knew I wanted the iron-on option. But this was on a bolt, not in a nice package that was one-inch wide. So now I had to decide how much to get. The new, non-sewing clerk did know that most people got a quarter of a yard. Since I didn't want to take a chance at not having enough, I got half of a yard. I took my "interfacing" home and cut it into one-inch yard strips, using about half of what I had bought. I started ironing it on and discovered that there is a right side and a wrong side. I found this out because the interfacing was sticking to the damp cloth that you use to protect the material, per the instructions. Good thing I bought more than enough. I sewed the ties on and hung my beautiful curtains. But one curtain didn't look right at all. In fact, it was a little shorter than the other. Upon further investigation, I discovered that I had ironed on interfacing and sewn on ties to the SIDE of the curtain rather than the TOP of the curtain!! Oh boy!!! I ripped out the stitching on the ties and ironed-on more interfacing to the top. Now it was REALLY a good thing I had bought more than enough. I know myself really well. I restitched the ties and, with some trepidation, hung the curtains again. Perfect!!! This project took considerably longer than I had thought it would, but I'm very happy with the results.

Tuesday, December 13, 2011
It Was Sew Easy
I had to take a break from sewing while the kitchen/dining room project was going on. That project, though, has created new things to sew. One of the things that I did as the dominoes were falling from the dining room down the hall was that I cleaned out the spare room in order to make it a real guest room and I moved all sewing/craft type projects into the den. The den is now a den/project room. While I was doing THAT, I decided to update things and wanted to make new curtains. Up until now all of my sewing experiences have been done under the watchful guidance of my sister-in-law Tia. But the days are busy for all of us and I was getting tired of waiting for her. So last night I decided to just do it myself. I had bought a basic sewing book and one of the chapters included how to make simple curtains. I took a deep breath and started in. I was nervous that I would make a wrong cut or an uneven stitch. But in just two hours, I had finished!!!!!! It was my very own, completely on my own sewing project!! I'm so pleased. I really can do it!!! At one point as I was sitting at the sewing machine, humming along, Tom walked into the room and said "My wife. Look at her sewing!!" It made me smile. And so do the new curtains.


Friday, August 19, 2011
Countdown - Day 137
My plan was to lose twenty-five pounds. All of the changes that I am making are changes for a lifetime. I need to be smarter about my food choices and smarter about my exercising. I feel that these changes have been positive. I'm happy with them. But I have been stalled out. I haven't been able to get past the seventeen pound mark for some now. So when a friend suggested that we take the Body Fit Challenge at California Family Fitness, I was jazzed. It would provide that jump-start that I need. Today was the first day. There are five of us in our group. We have a personal trainer working with us. We'll be together for eight weeks. We worked with the exercise ball. We did lunges. We did sit-ups and planks. We worked with weights. It felt good. I'm excited that I'll be working out with people, being encouraged and encouraging others. This is just what I needed.
Subscribe to:
Posts (Atom)